 In the world of highly nutritious and delicious foods, microgreens find themselves near the very top. Urban farmers across the world have fallen head over heels for these short and green delights, but what exactly is all the fuss about?
What are Microgreens?
Microgreens aren’t nearly as strange as they may seem at first glance. These small shoots of green leaves are in fact edible vegetables, herbs, and flowers, that are harvested at a much earlier growth stage than normal.
Instead of taking multiple months to grow, microgreens can be harvested in anywhere from 7-21 days, depending on the crop. They only reach a height of 1 – 3 inches and can even be grown in your own home using minimal equipment.
What Makes Microgreens So Special?
Besides their extraordinarily quick harvesting time, microgreens also happen to be incredibly nutritious. A 2012 study published in the Journal of Agricultural and Food Chemistry, showed that microgreens can be anywhere from 4 – 40 times as nutrient dense as their adult counterparts, depending on the crop.
In 2017, another study published through Frontiers In Nutrition, showed that broccoli microgreens grown in compost had higher levels of Potassium, Magnesium, Manganese, Zinc, Iron, Calcium, Sodium, and even Copper, than adult broccoli florets.
Interestingly, they also happen to be far more flavorful than adult greens, and are in high demand in the restaurant world, providing intense flavor in salads and garnishes.
What Microgreens Can I Grow at Home?
Countless varieties exist that can be grown at home, with the differences between them usually amounting to either short (7 days) or long (21 days) growth periods. Here’s a short list of some common microgreens that can be grown at home:
- Spinach
- Pea
- Broccoli
- Arugula
- Basil
- Radish
- Carrot
- Celery
- Sunflower
- Cilantro
What Do I Need to Grow Microgreens?
Growing microgreens has become incredibly easy in today’s modern world. If you’re willing to spend the money, there are several kits being sold online that provide you with everything you need to start your first grow. For those who wish to do it without a kit, the materials needed can easily be grabbed at your local gardening store.
What you’ll need:
- High Quality Seeds
- 1 Spray Bottle
- 2 – 4 Growing Trays
- Potting Soil
- Scissors/Knife
Depending on how many microgreens you wish to grow at one time, or if your intention is to turn this into a small business, other items may become necessary, such as UV lights and growing racks. For someone wanting to just grow one or two different crops at a time, the 5 items listed above will do great.
What are the Steps to Plant and Grow Microgreens?
Before starting this process, make sure you have a place set aside in your home that is reasonably dark — like a closet or garage — so that the seeds will safely germinate and turn into sprouts. Here are the basic steps to growing microgreens:
- Place about 1 to 1 ½ inches of potting soil into your tray, spreading it evenly throughout. If the soil is too dry and is creating dust, lightly water it to make the process easier.
- Spread the seeds over the soil as evenly and uniformly as possible. Make sure the seeds aren’t too crowded, but at the same time use as many as possible.
- Using your spray bottle, give the seeds a decent watering, making sure not to drown them, but just enough to saturate them and the soil.
- Grab another tray and place it directly on top of the seeds. As the seeds sprout, the shoots will slowly push the tray upwards, and will also make the sprouts strong and healthy.
- Take the trays to your predetermined darkened place, and simply leave them there for somewhere around 3 – 4 days. Make sure to water them with the spray bottle twice a day, being careful not to drown them.
- Once they have fully sprouted, they should appear yellow (completely normal), and are now ready to be brought into sunlight. Place them next to a window — preferably south facing — making sure to continue watering each day.
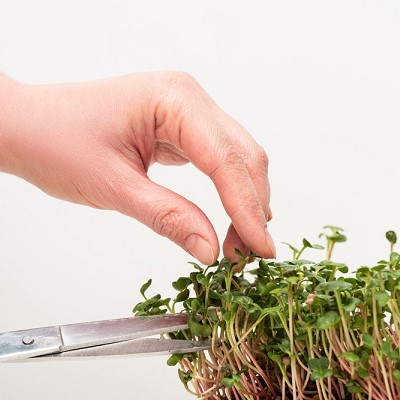
- Once they have reached 1 – 3 inches in height and have the beginnings of what will become adult leaves, they’re ready to harvest.
- Using scissors or a sharp knife, cut the stems as close to the soil as possible.
How Should I Eat Microgreens?
Microgreens are best enjoyed freshly cut, but can be eaten several days after harvesting, as long as they’re refrigerated. Microgreens deteriorate quickly, so take care to store them properly.
The most common ways to consume microgreens are in salads, smoothies, juices, and garnishes for meals. They also make a great snack, so feel free to eat them plain. Just remember, they can have intense flavor, so be sure not to overdo it.